Audio quality is often the unsung hero of video production. While visuals capture attention, clear and professional sound is what keeps viewers engaged and reinforces the credibility of your content. Whether you're a filmmaker, content creator, or small business owner, understanding how to select the right microphone for your project can make a world of difference. This guide breaks down the essentials of microphone selection, from understanding your recording needs to choosing the best tools for your specific scenarios.
Why Audio Quality Matters in Video Production
High-quality sound is critical for all types of video content, from YouTube tutorials to corporate training videos. Poor audio can distract viewers, reduce the perceived professionalism of your work, and even cause them to abandon your content mid-video. Think of it this way: a viewer is more likely to trust a speaker whose voice is crisp and clear than one whose audio is muffled or distorted.
Audio quality also plays a key role in viewer retention. Studies show that videos with poor sound are more likely to be skipped or shared less frequently. For creators aiming to build a loyal audience, investing in the right microphone is a foundational step.
Key Considerations for Audio Clarity
- Dialogue clarity: Clear speech is essential for interviews, tutorials, and podcasts.
- Ambient noise: Background sounds can drown out your subject’s voice, especially in busy environments.
- Consistency: Your audio should remain stable throughout the recording, without sudden volume drops or feedback.
Understanding Your Recording Needs
Before selecting a microphone, ask yourself: What is the purpose of your video, and what environment will you be recording in? The answer will determine which microphone type is best suited for your project.
1. Dialogue and Shot Type
If your video relies heavily on spoken words—such as interviews, voiceovers, or tutorials—prioritize microphones that capture clear, direct sound. Avoid environments with excessive background noise, like a crowded café or a noisy street. Even a small amount of ambient noise can make your audio hard to follow.
2. Location and Mobility
- Studio settings: Fixed microphones like shotgun mics or condensers are ideal for controlled environments.
- On-the-go scenarios: Handheld or lavalier mics offer flexibility for field recordings, events, or travel vlogs.
- Remote locations: Consider microphones that can handle wind noise or unpredictable environments, such as outdoor interviews.
3. Budget and Technical Skills
Microphones vary widely in price and complexity. Entry-level options may lack features like noise cancellation, while professional-grade mics offer advanced controls. Always balance cost with your technical expertise—some features, like directional pickup patterns, may require additional setup or knowledge to use effectively.
How to Choose Your Microphone: Three Favorites Explained
Selecting the right microphone depends on your specific use case. Here’s a breakdown of three popular types, along with their strengths and limitations.
1. Boom Microphones: Best for Close-Ups and Interviews
Boom mics are long, directional microphones mounted on a boom pole. They excel in controlled environments like studios or interviews, where you can position the mic close to the subject’s mouth. Their narrow pickup pattern minimizes background noise, making them ideal for capturing clear dialogue.
Strengths:
- Excellent for one-on-one interviews or voiceovers.
- Reduces ambient noise by focusing on the subject.
- Often includes a pop filter to prevent plosive sounds (like "p" or "b").
Limitations:
- Requires setup time and a stable mount.
- Not practical for handheld use or on-the-go scenarios.
- Can be cumbersome in tight spaces.
Use Case Example: A local church streaming weekly services might use a boom mic to capture clear sermons while avoiding the noise of the congregation.
2. Handheld Microphones: Suitable for On-the-Go Interviews
Handheld mics are compact, portable, and ideal for field recordings. They’re popular among travel vloggers, event hosts, and creators who need flexibility. Many models include built-in features like wind screens and adjustable gain controls.
Strengths:
- Easy to use and transport.
- Offers directional pickup to isolate the subject’s voice.
- Some models include built-in recording capabilities.
Limitations:
- Less precise than boom mics in controlled environments.
- May struggle with wind noise in outdoor settings.
- Lower-end models can introduce background noise or distortion.
Use Case Example: A fitness instructor recording workout demonstrations might use a handheld mic to capture clear instructions while moving around the gym.
3. Lavalier Microphones: Ideal for Long-Distance Shots and Active Scenarios
Lavalier (or "lapel") mics are small, clip-on devices that attach to clothing. They’re perfect for scenarios where the subject is moving or needs to be captured from a distance, such as during a live event or a documentary shoot.
Strengths:
- Hands-free operation for active scenarios.
- Can be positioned close to the subject without visible equipment.
- Works well in environments where a boom mic would be impractical.
Limitations:
- Limited directional control, which can capture unwanted background noise.
- Requires careful placement to avoid clothing rustles or interference.
- May not capture the full range of vocal dynamics compared to other mics.
Use Case Example: A documentary filmmaker shooting in remote areas might use a lavalier mic to capture clear audio while the subject moves through different environments.
Key Factors to Consider When Selecting a Microphone
Choosing the right microphone isn’t just about picking the "best" option—it’s about matching the tool to your specific needs. Here are critical factors to evaluate before making a decision.
1. Budget Range and Equipment Costs
Microphones range from budget-friendly options (under $100) to high-end professional models (over $1,000). While a lower-cost mic may meet basic needs, it may lack features like noise cancellation or durability. For example, a beginner content creator might start with a USB condenser mic, while a professional filmmaker might invest in a studio-grade shotgun mic with a preamp.
2. Environmental Factors Affecting Sound Capture
- Outdoor vs. indoor: Wind noise, humidity, and temperature can impact microphone performance. Look for mics with weather-resistant designs or wind screens for outdoor use.
- Background noise: In noisy environments, a directional mic (like a boom or lavalier) can help isolate your subject’s voice.
- Acoustic treatment: If you’re recording in a room with hard surfaces, consider using acoustic panels or blankets to reduce echo.
3. Ease of Use and Setup Requirements
Some microphones require additional equipment, like a mixer or soundcard, to function properly. For example, a condenser mic may need phantom power, while a dynamic mic can work with a basic audio interface. Always check if the microphone you choose aligns with your existing gear or if you’ll need to invest in complementary tools.
4. Compatibility with Your Workflow
If you’re using a platform like dcast.tv to manage your video content, ensuring your microphone integrates seamlessly with your workflow is essential. For instance, a lavalier mic paired with a reliable audio interface can help you capture clear sound for on-demand content, while a boom mic might be better suited for live streaming.
Practical Tips for Improving Audio Quality
Even the best microphone can’t fix poor audio if you don’t plan properly. Here are actionable tips to enhance your recordings:
1. Test Your Setup Before Recording
- Check for background noise: Record a short test clip to ensure your environment is quiet.
- Adjust gain settings: Avoid clipping by balancing the microphone’s sensitivity.
- Use a pop filter: This reduces plosive sounds and improves vocal clarity.
2. Optimize Your Location
- Choose a quiet space: Record in a room with minimal background noise.
- Use acoustic treatments: Carpets, curtains, or foam panels can absorb echo.
- Avoid reflective surfaces: Hard floors or walls can create unwanted reverberation.
3. Practice Good Mic Technique
- Position the mic correctly: For a boom mic, aim it slightly below the subject’s mouth to avoid plosives.
- Maintain consistent distance: Keep the microphone at a consistent distance to ensure balanced audio.
- Use a stand or mount: Avoid holding the mic with your hand, which can introduce handling noise.
Advanced Microphone Techniques and Tips
Beyond basic selection, mastering microphone techniques can significantly improve your audio quality.
Proximity and Positioning
Microphone placement dramatically affects sound quality:
- Distance matters: Most microphones perform best 6-12 inches from the source
- Angle optimization: Position mics at slight angles to reduce plosives
- Height adjustment: Place mics at mouth level or slightly below for natural sound
- Consistent positioning: Maintain the same distance throughout recording
Handling Noise Reduction
Minimize unwanted sounds from microphone handling:
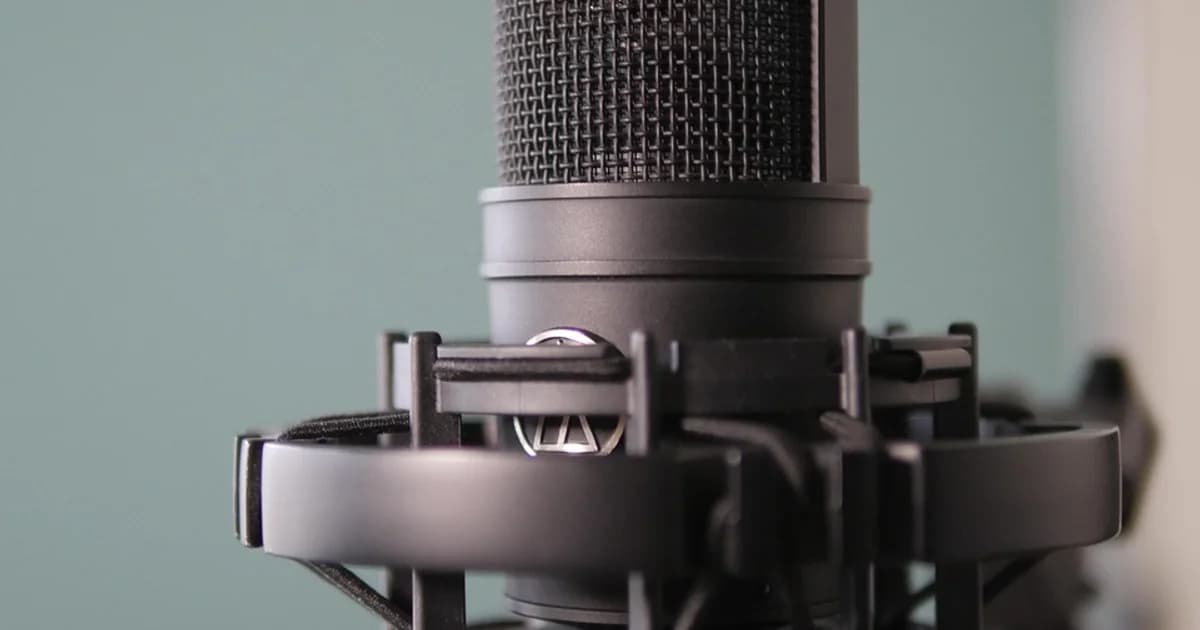
- Use shock mounts: Isolate microphones from vibrations
- Avoid hand-holding: Use stands or mounts whenever possible
- Cable management: Secure cables to prevent movement noise
- Wind protection: Use wind screens or dead cats for outdoor recording
Room Acoustics Optimization
Improve your recording environment without expensive treatments:
- Soft furnishings: Add carpets, curtains, or furniture to reduce echo
- Avoid hard surfaces: Record away from bare walls or windows
- Closet recording: Small closets with clothes can create natural sound dampening
- Portable isolation: Use portable vocal booths for better sound isolation
Microphone Maintenance and Care
Proper maintenance extends microphone lifespan and ensures consistent performance.
Regular Cleaning
Keep microphones clean to maintain sound quality:
- Gentle cleaning: Use soft brushes or microfiber cloths
- Avoid moisture: Never use liquid cleaners directly on microphones
- Pop filter care: Clean pop filters regularly to prevent buildup
- Storage: Store microphones in protective cases when not in use
Cable and Connector Care
Maintain cables and connectors for reliable connections:
- Avoid kinks: Coil cables properly to prevent damage
- Check connections: Regularly inspect connectors for wear
- Replace damaged cables: Don't use cables with visible damage
- Proper storage: Store cables loosely coiled to prevent stress
Troubleshooting Common Issues
Address common microphone problems quickly:
- No sound: Check connections, power supply, and input settings
- Distorted audio: Reduce gain levels or move microphone further from source
- Background noise: Improve room acoustics or use directional microphones
- Inconsistent levels: Check for loose connections or damaged cables
Budget-Friendly Alternatives and Upgrades
You don't need expensive equipment to achieve good audio quality.
Entry-Level Options
Start with affordable microphones that deliver solid performance:
- USB condenser mics: Plug-and-play options under $100
- Smartphone adapters: Use your phone's microphone with proper adapters
- Lavalier options: Affordable clip-on mics for hands-free recording
- Used equipment: Quality microphones available second-hand
Gradual Upgrades
Build your audio setup incrementally:
- Start with basics: Begin with entry-level equipment
- Add accessories: Invest in pop filters, stands, and cables
- Upgrade strategically: Replace components as your needs grow
- Rent before buying: Test expensive equipment before purchasing
DIY Solutions
Create effective audio solutions on a budget:
- Homemade pop filters: Use pantyhose and embroidery hoops
- Acoustic treatment: Hang blankets or use foam panels
- Reflection filters: Create portable isolation with cardboard and foam
- Wind protection: Use foam covers or fabric wind screens
Conclusion: Planning and Preparation Are Key
Selecting the right microphone is just the first step in creating high-quality video content. Equally important is planning and preparation—whether it's testing your setup, optimizing your environment, or practicing good mic technique. By understanding your recording needs and matching them to the right tool, you can ensure your audio remains clear, consistent, and professional.
For creators looking to streamline their video production workflow, platforms like dcast.tv offer integrated tools for managing and distributing content. Whether you're capturing live streams or on-demand videos, the right audio setup can elevate your work and keep your audience engaged.
Remember: The best microphone for your project isn't always the most expensive one—it's the one that fits your specific needs and environment. Take the time to evaluate your options, invest in proper technique and setup, and you'll be rewarded with audio that supports your creative vision and keeps viewers engaged from start to finish.